Ah Pinterest, how we love you so…it makes looking for inspiration for your wedding (or house renovation, recipe ideas, capsule wardrobe etc..) a breeze. You pop in to have a quick look for ideas and before you know it an hour has passed and you’ve pinned like there’s no tomorrow!

Here are a few tips to keep in mind when using Pinterest for your wedding planning:
1. Separate all the different aspects of your wedding into their own boards: general look/colours, flowers, décor ideas, cake, stationery, fashion, make up etc
2. As you pin write in the description box what you like about the image or idea
3. When you pin an image it will bring up related images if you scroll down, this can be a good place to find additional ideas that are in keeping with your style.
4. The search bar is your friend use it to your advantage and notice underneath it Pinterest quite helpfully gives you additional items to look for.
5. Don’t restrict yourself to just wedding images, broaden your search to other areas-interiors, art, fashion etc-think about all the things you like.
6. You can create secret boards if you don’t want your boards public, quite handy for the dress shopping!
7. You can share boards with your suppliers to give them an insight into your ideas.

But it’s all too easy to be overwhelmed by so many wonderful ideas… what to do with all this wedding inspiration? Use your pins to create a streamlined mood board of your overall look of the day.
So how do you create a mood-board?
The walkthrough below has been created on Google Picasa http://picasa.google.com/
Picasa has unfortunately been discontinued by Google but you can create mood boards on Canva using a similar process.
You download it to your computer (it’s free too) and it has a handy collage function that makes putting a mood board together a breeze.
Here’s a step-by-step guide on how to create your mood board:
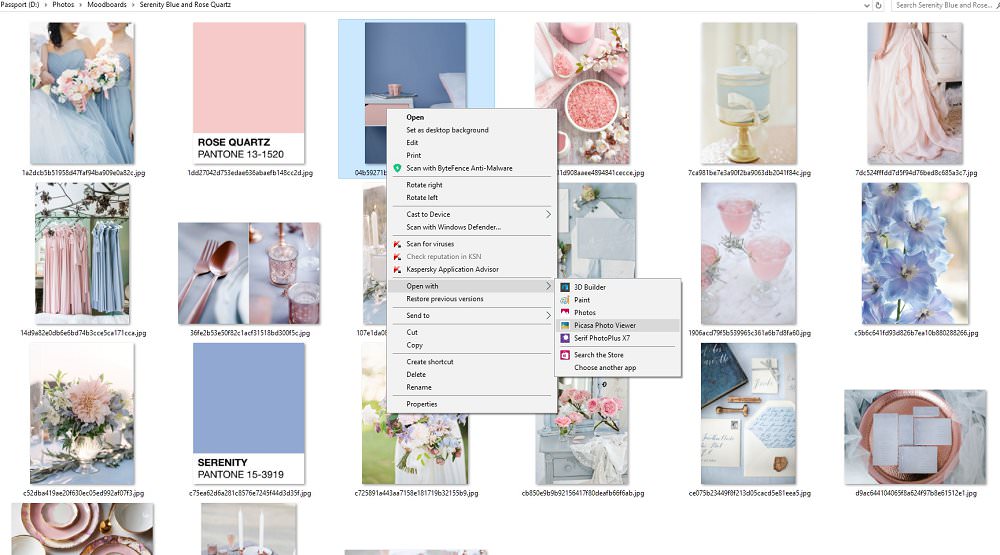
1. Save your images from your Pinterest board to a folder on your computer. Click on the image from your board so you see it on its own and save it then so you get the best resolution of the image.
2. Once all your images have been saved on your computer, right-click an image and “open in” -Picassa Photo Viewer
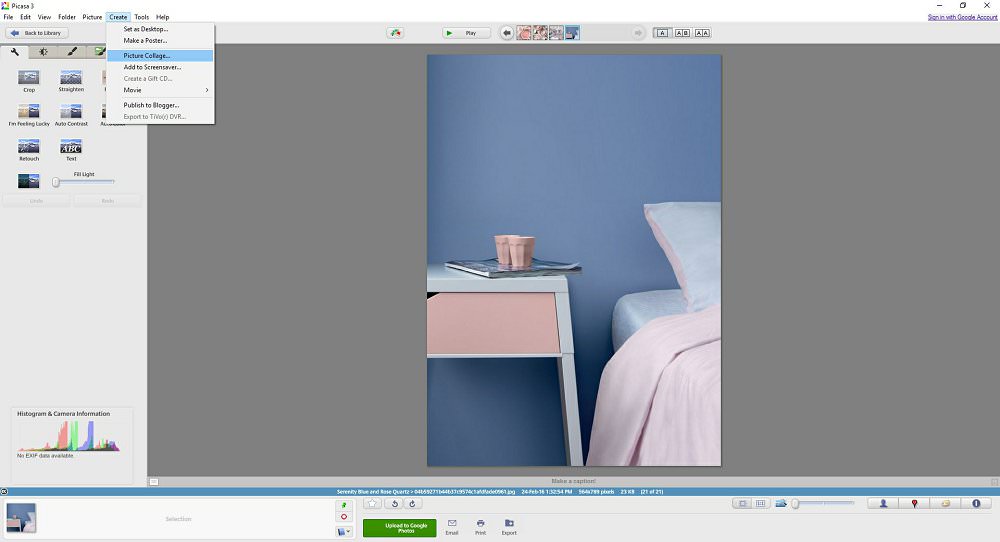
3. Hover at the bottom of the image and there will be an option to EDIT IN PICASSA click!
4. In the top left-hand corner click on CREATE > PICTURE COLLAGE
5. Once the image opens you will see there are 2 tabs LIBRARY and COLLAGE and below these SETTINGS and CLIPS
6. Click on Clip and all the images that were in the saved folder will appear, click the green + sign and it will add to your collage.
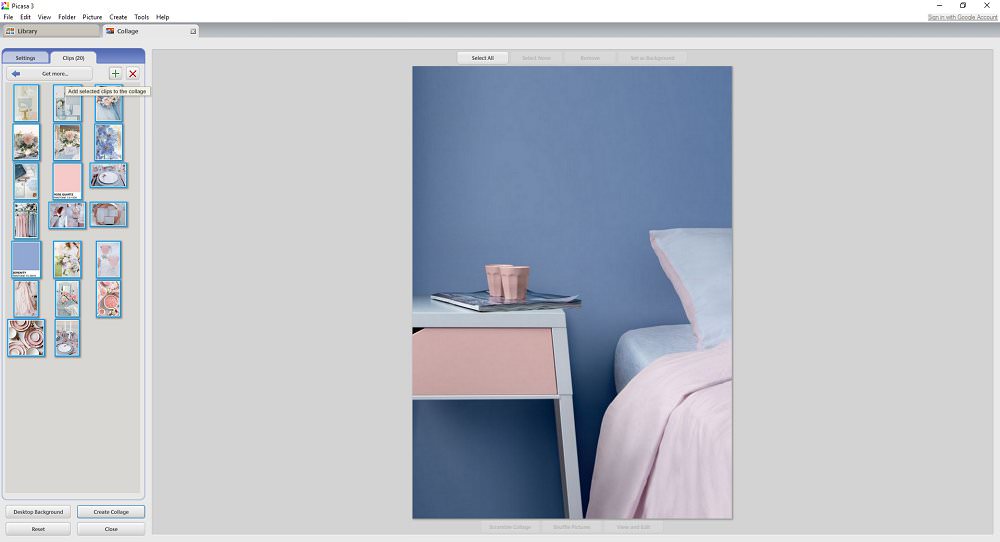
7. Under SETTINGS there is a drop-down menu that gives you all the different collage options, the three I use are
PICTURE PILE
MOSAIC
GRID
8. I suggest playing around with all three, I have shown examples below.

9. Also under SETTINGS are options for changing the grid spacing (the margins around your images) background colour options, page format and layout
10. Once you are happy with your mood board or collage just hit CREATE COLLAGE to save.
These collages or mood boards all have the same images I just used the different settings:
Mosaic Picture Pile Grid

Tips on creating a beautiful mood board
I tend to start with all the images from the folder and systematically work my way through the images, removing images I don’t like.
Once I’m happy with the remaining images, I’d say any amount from 6-12 is a good number to work with, but less is often better.
I will play around with the SHUFFLE PICTURES button until I’m happy with how the images sit together.
You can click on an image to swap it around with another but it will keep the original size ratio.
You can also click on an image and then VIEW AND EDIT this will give you the option to crop an image, (I suggest only cropping the images if you are using the mood board for personal inspiration after all the photographer may not appreciate their work being cropped!)
Save Pantone colour chip images too then you can add them to your mood board for colour reference.
In the same way, I suggested you create different Pinterest Boards for different areas of your wedding day you can also create specific mood boards.
And here’s the final mood board:

As part of my full wedding planning service, I include wedding design; I will put together a comprehensive design brief including moodboards. So get in touch today if you’d rather not do it yourself and we can chat about how I can help you design your perfect wedding day!
Mood board credits
Tablescape/table setting/ stationery on copper plate Photographer: Hilal und Moses via Frieda Theres
Hanging Bridesmaids dresses Photographer: Ann-Kathrin Koch via MOD Wedding
Blue Flowers Happy Buddha Breathing
Bridesmaids with bouquets Photography: Kurt Boomer Photography via Style Me Pretty
Invitation suitte Photography: Ashley Bosnick Photography via Style Me Pretty
Pink drinks: a pair and a spare
Blue walled bedroom via Marie Claire Maison
Blush pink wedding dress Photography by Maraluce via Style me Pretty
Flowers with table number Photographer: Jose Villa via MOD Wedding
Plates by Suite One Studio via The Pretty Crusade